
Your helium balloons are floating away again. I’ve been there – watching expensive party decorations disappear into the sky during my daughter’s fifth birthday party taught me the hard way.
Balloon weights keep your decorations grounded, but store-bought options cost $3-8 each and look generic. That’s why I started making my own.
Over the past decade, I’ve created weights for 50+ parties using everything from polymer clay to water-filled balloons.
This guide covers: weight requirements for different balloon sizes, step-by-step tutorials for 10+ DIY techniques, material costs (most under $1 per weight), and safety guidelines learned through experience.
You’ll get exact measurements, tested materials lists, and photo tutorials from actual parties. Whether you need refined wedding weights or fun birthday themes, these proven methods work for any budget.
9 Simple Balloon Weights Ideas
Water-filled balloon weights offer a quick, cheap, and safe last-minute solution that’s customizable and won’t damage furniture or injure children when dropped.
1. Basic Water Weight Construction
Start with quality balloons because cheap ones burst easily and create messes. I recommend 11-inch latex balloons for most projects.
Hold the balloon neck tightly over a slowly running tap while controlling the water flow carefully. Too fast and you’ll overfill or create splashing everywhere. Fill gradually while watching the balloon expand to the proper size.
For 11-inch helium balloons, fill your weight balloon with 10-50 grams of water, which equals about 2-3 tablespoons. For larger 16-24-inch balloons, use 120 grams or about half a cup.
Tie the balloon neck in a tight double-knot for extra security. Test your weight before the party by attaching it to a helium balloon.
2. Double-Balloon Security Method
Double-balloon technique prevents disasters that I learned about after a weight burst during my nephew’s graduation party.
This method uses two balloons for extra protection against bursts, punctures, and general wear from handling. Insert one balloon completely inside another before filling, pushing the inner balloon to the bottom.
Both balloon necks should align at the opening for proper sealing. Fill with water through both balloon layers, with water going into the inner balloon first.
The outer balloon provides essential containment if the inner one fails unexpectedly. Tie both balloon necks together in one secure knot to create a double-sealed system.
Quality balloons cost more but last significantly longer, so spend extra for better durability.
3. Decorative Water Weight Variations
Plain water balloons look boring at themed parties, so add color and sparkle to match your celebration.
Food coloring transforms clear water into vibrant themes using 3-4 drops per balloon for rich colors. Red works for Valentine’s Day, green for St. Patrick’s Day, and blue for ocean themes.
Glitter creates magical sparkle effects when you use fine cosmetic glitter instead of craft glitter. Add one teaspoon per balloon and shake gently after filling for even distribution.
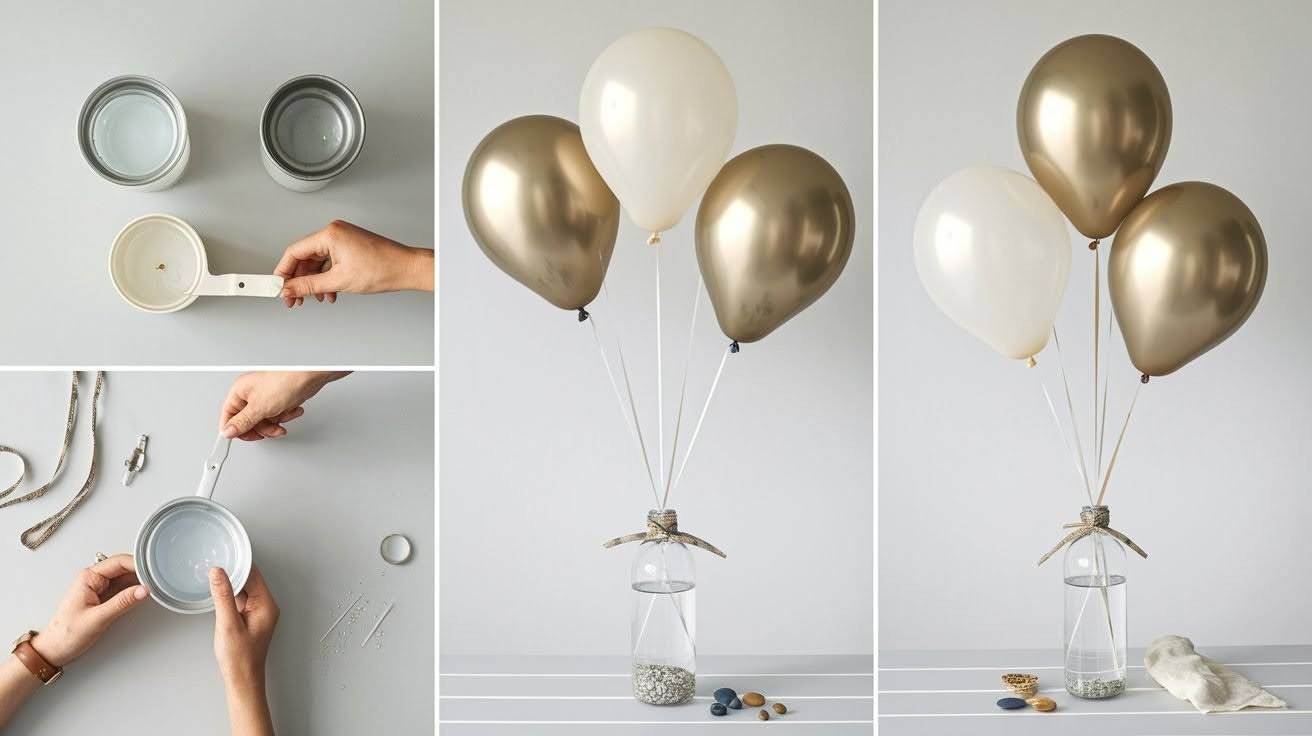
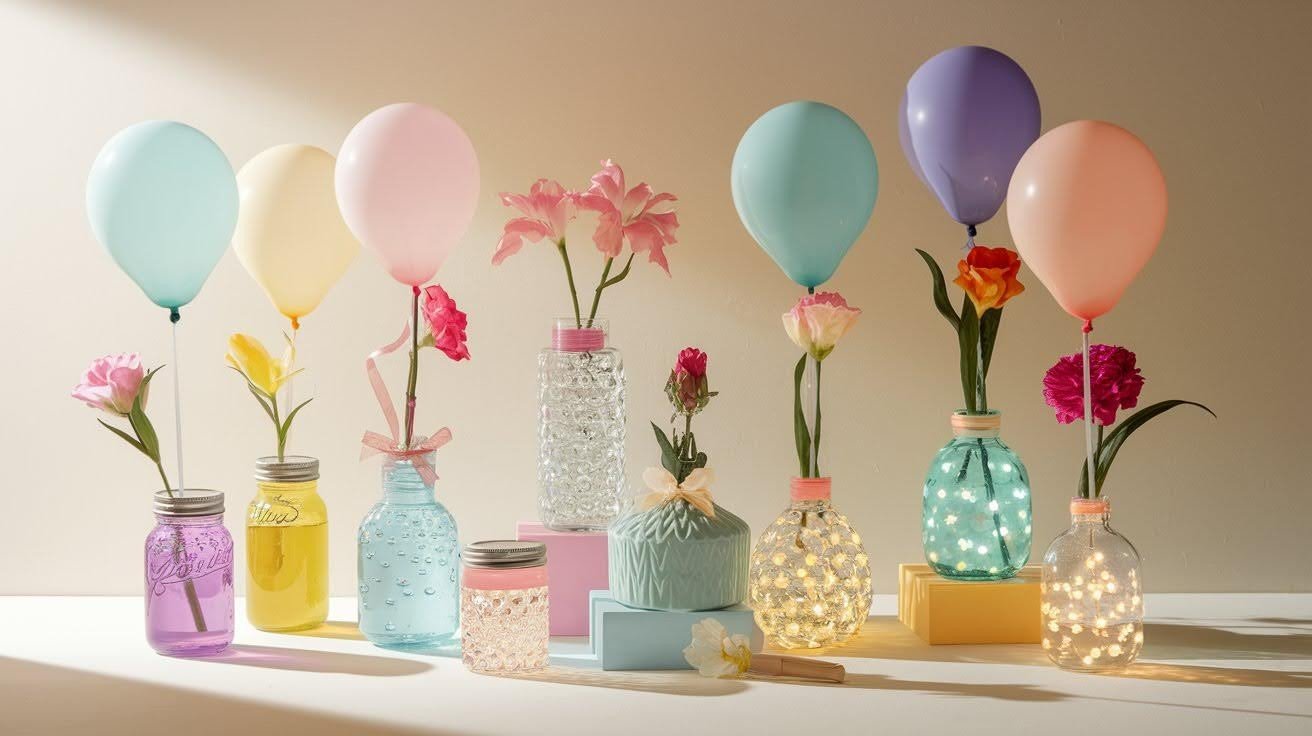
Clear containers show off colored water beautifully through small mason jars or plastic bottles filled with colored water.
Waterproof labels stick to wet balloon surfaces when you write names, ages, or party messages using permanent markers on masking tape applied to dry balloons.
4. Plastic Container Weights
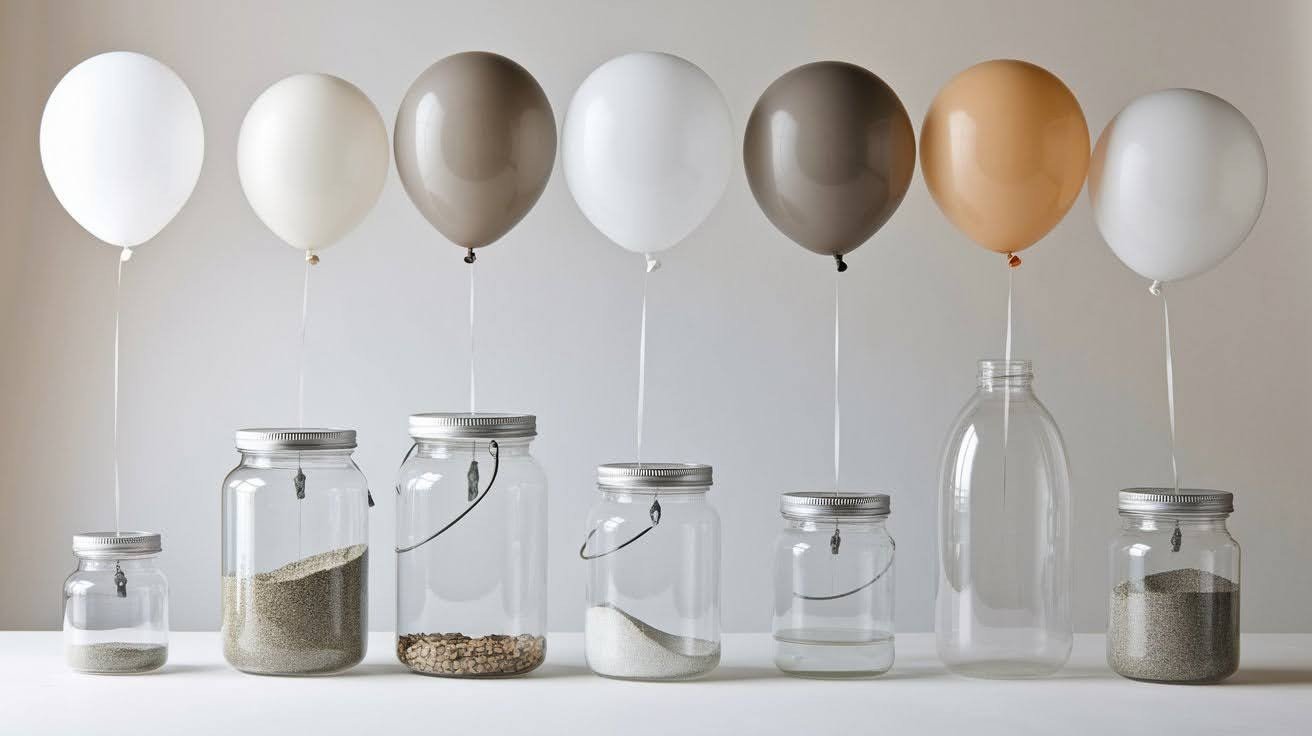
Every household has perfect containers hiding in recycling bins and storage closets that work beautifully for balloon weights.
Small yogurt cups work great for lightweight balloons after cleaning them thoroughly and removing all labels completely. Plastic water bottles handle heavier balloons and outdoor parties where durability matters most.
Fill containers with sand for the best weight-to-size ratio since sand packs tightly and won’t shift during transport or setup. Small pebbles work too, but create more noise when moved around.
Rice provides a cheaper filling for indoor parties, where one cup weighs about 8 ounces, perfect for large balloon displays.
Seal containers with strong tape around lid edges using duct tape for permanent sealing or clear packing tape for neater decorative weights that look more professional.
5. Decorative Fabric Pouch Weights
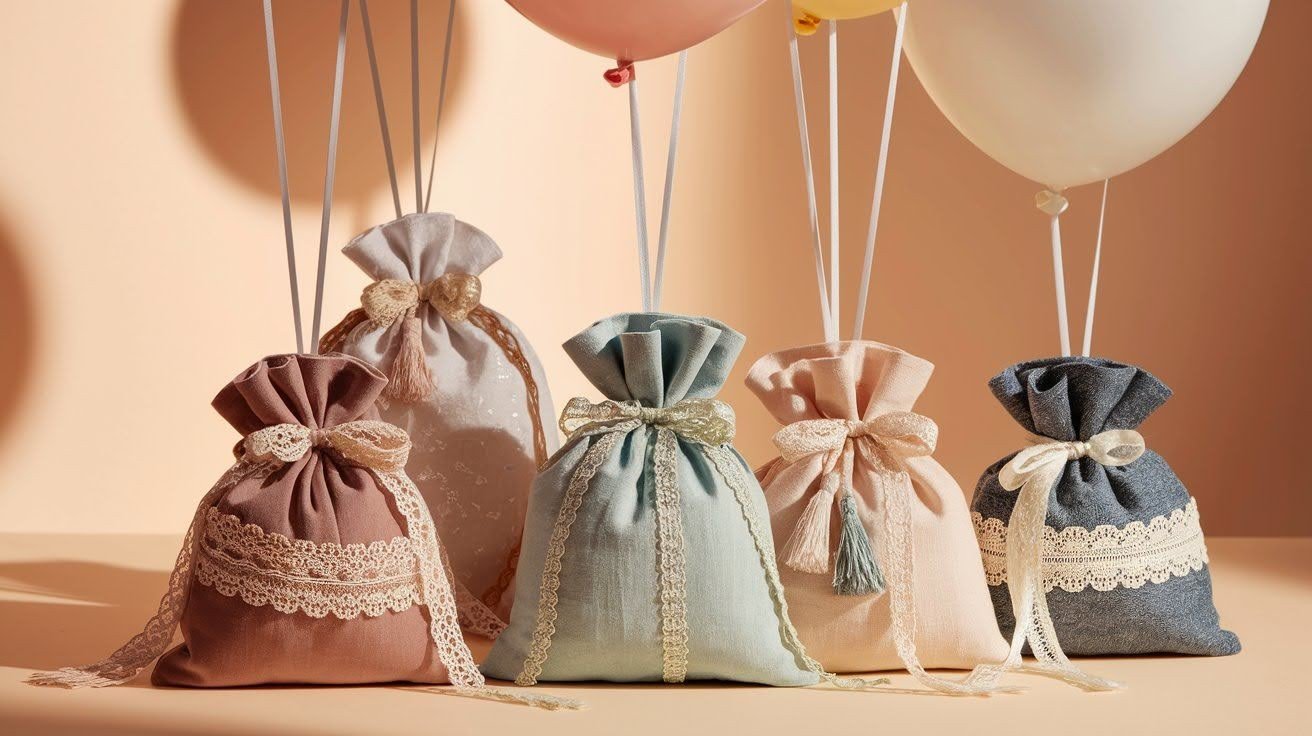
Fabric pouches feel more refined than plastic containers, which is why I make them for wedding and anniversary parties.
Cut fabric squares 6 inches by 6 inches for standard weights using cotton and canvas because they’re strong and easy to sew properly.
Sew three sides with a half-inch seam allowance while leaving one side open for filling materials. Turn the pouch inside-out so seams are hidden and the finished product looks professional.
Fill with sand or rice until the pouch feels heavy but not overstuffed, leaving room to sew the opening closed securely. Fold the open edge inward and stitch with doubled thread for extra strength.
Hand-sewing works fine for small projects, while machine sewing goes faster for large quantities. Embellishment options include embroidery, fabric paint, applique shapes, and iron-on patches for quick decoration.
6. Glass and Ceramic Container Options
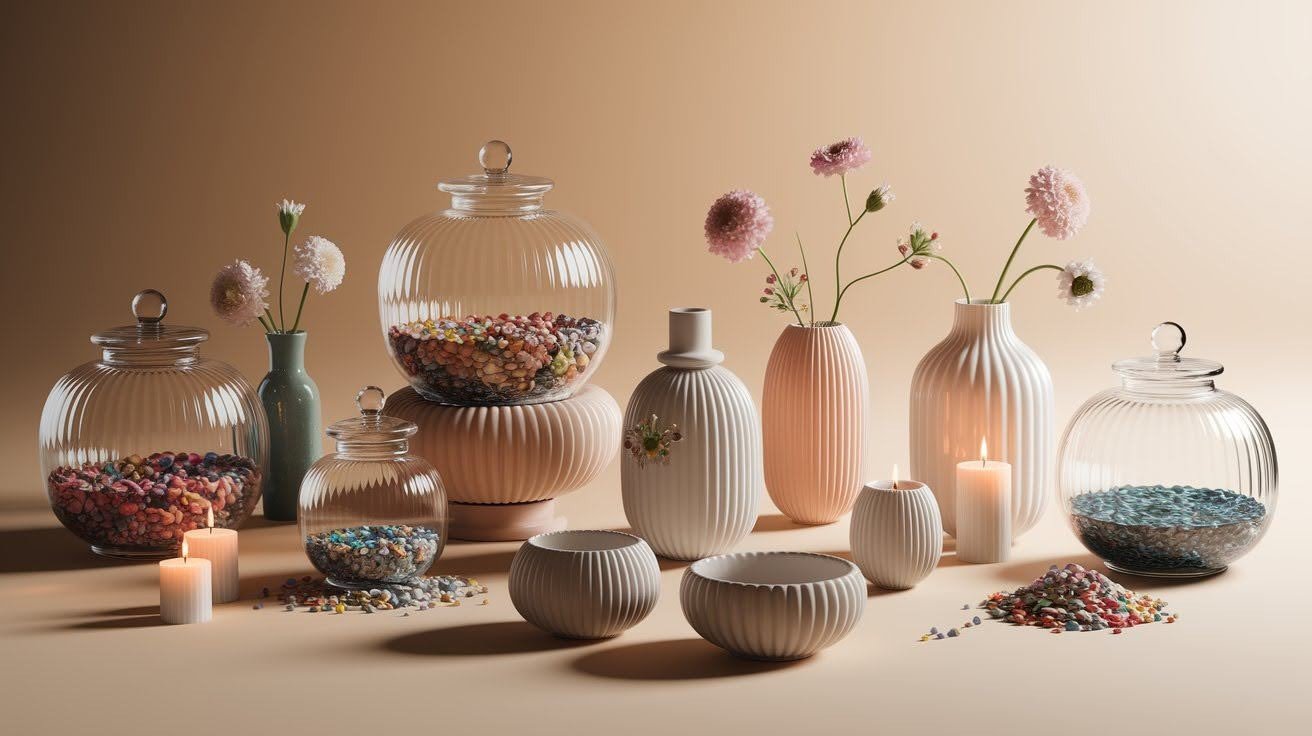
Glass containers look refined but require extra care around children and outdoor spaces where breakage becomes a serious concern.
Small mason jars make perfect balloon weights because they’re heavy, stable, and widely available at craft stores. Baby food jars work for lighter balloons while providing the same refined appearance.
Fill glass containers with decorative stones or colored sand, layering different colors for beautiful visual effects that catch light. Clear marbles catch light beautifully for evening parties and create stunning displays.
Never use broken or chipped glass containers after inspecting each jar carefully before filling and decorating.
Breakage prevention includes using rubber mats under glass weights, keeping children away from glass areas, choosing plastic alternatives for outdoor parties, and wrapping containers in bubble wrap for transport.
Child-safe alternatives include thick acrylic containers that provide a refined appearance without safety concerns.
7. Polymer Clay Letter Weights
Letter weights spell out party messages that guests remember long after the event ends and photographs are shared on social media.
Knead polymer clay until it’s soft and pliable, with Sculpey brand working easiest for beginners starting their first projects.
Harder clays need more kneading but hold detail better for intricate designs and professional-looking finishes. Print letters on paper using bold, wide fonts at least 3 inches tall for proper weight and visibility from across the room.
Cut out each letter precisely with scissors for accurate templates. Roll clay evenly using popsicle sticks as thickness guides by stacking two sticks for consistent depth throughout your project.
Place paper letters on flattened clay and cut around edges using sharp knives or X-ACTO blades for clean, professional cuts while removing paper templates carefully.
8. Polymer Clay Finishing Techniques
Finishing makes amateur projects look professional when you take time with these final steps that transform basic clay into stunning decorations.
Let baked clay cool completely before handling because hot clay breaks easily and can burn your fingers painfully.
Wait at least 30 minutes after baking before attempting any finishing work or decoration application.
Liquid leaf creates beautiful metallic finishes when applied with soft brushes in thin, even coats that dry evenly. Gold and silver work for most party themes while providing refined sophistication.
Spray paint offers easier application than liquid leaf with light, multiple coats instead of one heavy application that might drip or run.
Create hooks using small paperclips by bending the middle section forward and cutting off the top loop with wire cutters.
Hot glue provides a strong attachment when mounting letters on wooden boards with generous amounts around letter bases.
9. Seasonal and Holiday Adaptations
Change themes throughout the year to keep your weight collection fresh and relevant for different celebrations.
Halloween weights use orange and black color schemes with plastic spiders or ghost cutouts added to clay letters for spooky effects.
Glow-in-the-dark paint creates atmospheric lighting that enhances the Halloween mood perfectly. Christmas variations incorporate red, green, and gold themes, while glitter spray adds festive sparkle beautifully.
Small jingle bells create delightful sound effects when balloons move in gentle breezes. Birthday customization includes age numbers and favorite colors with number-shaped weights for milestone birthdays.
Wedding weights use romantic color palettes including white, ivory, gold, and silver with pearl accents for refined elegance.
Conclusion
Creating DIY balloon weights doesn’t have to be complicated or expensive. From simple water-filled balloons to refined polymer clay letters, you now have proven techniques that work for any party theme and budget.
Whether you need a quick 5-minute solution or want to craft personalized keepsakes, these methods ensure your decorations stay put while adding creative flair.
Your balloon-floating disasters are officially over. Most materials cost under $1 per pound, and you probably have everything needed around your house.
Ready to try your first project? Start with water-filled balloons for your next party, then share a photo in the comments below.
I’d love to see which technique works best for your celebration and help with any questions along the way. Happy crafting and party planning!
Frequently Asked Questions
How much weight do I need for different balloon sizes?
Use 1 ounce (28g) for 9-inch balloons, 1.5-2 ounces (42-56g) for 11-inch balloons, 3-4 ounces (85-113g) for 16-inch balloons, and 8-10 ounces (227-283g) for 36-inch balloons. Water-filled balloons work great with 10-50g for small balloons.
What’s the cheapest way to make DIY balloon weights?
Water-filled balloons cost practically nothing and work perfectly for indoor parties. Fill 11-inch balloons with 2-3 tablespoons of water, tie securely, and attach to helium balloons. Add food coloring for themed colors at no extra cost.
Are homemade balloon weights safe for children’s parties?
Yes, when made properly. Water-filled balloons won’t cause injury if dropped, and fabric pouches are soft and safe. Avoid glass containers around young children and always supervise when using small parts like paperclips or beads that could pose choking hazards.
How long do DIY balloon weights last?
Water-filled balloon weights last 2-3 parties before needing replacement. Container-based weights with sand or rice can be reused for years. Polymer clay weights are permanent and can be stored indefinitely with proper care and handling.
Can I make balloon weights that match my party theme?
Absolutely! Add food coloring to water weights, decorate containers with themed stickers and ribbons, create polymer clay letters spelling party messages, or use fabric pouches in matching colors. Most DIY methods allow complete customization for any celebration.